/techfirstnow/media/member_avatars/YodgYEj3LV7y7UHyMiOo.jpg )
/techfirstnow/media/media_files/SzM30SRjo6ELYKq5qKdk.png)
How to Take a Screenshot on a Windows PC
 Follow Us
Taking screenshots on your Windows PC is a handy trick for creating visual references, documentation, memes, and more. In this post, We'll explain multiple methods for capturing screenshots on Windows PCs and laptops. Whether you want to take a screenshot of your full screen, active window, or a custom-selected area, We'll go over the steps to do it using Print Screen, Snipping Tool, and keyboard shortcuts.
Using the Print Screen Key
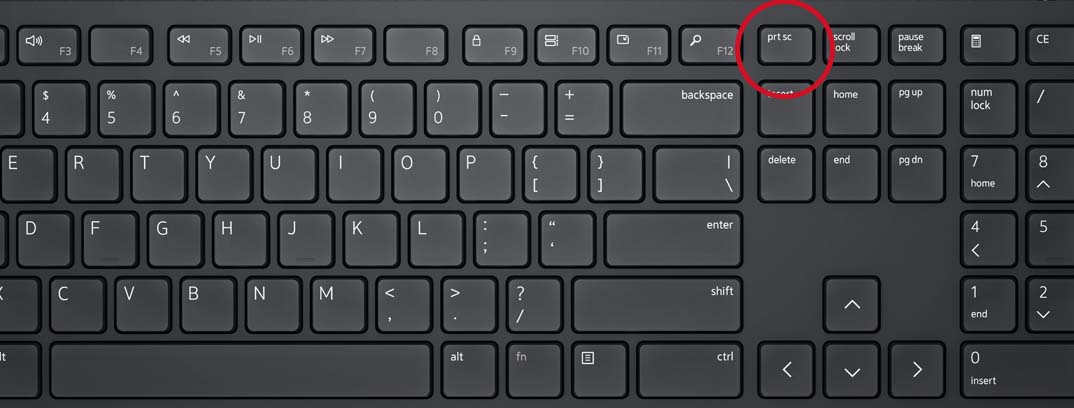
The easiest way to take a screenshot on a Windows PC is by using the Print Screen (PrtSc) key. The Print Screen key will copy an image of your entire screen to your clipboard.
Steps to Use the Print Screen Key:
-
Make sure the screen is showing what you want to capture.
-
Press the Print Screen (PrtSc) key on your keyboard - it's usually located near the F12 and Scroll Lock keys.
-
The screenshot will now be saved to your clipboard.
-
Open an image editing program like Paint and paste the screenshot from your clipboard.
-
Crop or edit the image as needed.
-
Save the screenshot as an image file like JPG or PNG.
The Print Screen method copies your entire screen. If you only want to capture a portion of your screen, use the Snipping Tool or keyboard shortcuts covered below.
Using Snipping Tool
Snipping Tool is an app included for free with Windows. It allows you to take customized screenshots.
How to Use Snipping Tool:
-
Open Snipping Tool - search for it in the Windows search bar.
-
Click New in the Snipping Tool.
-
Your screen will fade, and your cursor will change. Click and drag to select the area you want to capture.
-
The selected area will appear in the Snipping Tool editor.
-
Use the tools to annotate, crop, and save your snipped screenshot.
With Snipping Tool, you can capture any portion of your screen. It gives you more flexibility than Print Screen.
Keyboard Shortcut Methods
Windows also has built-in keyboard shortcuts you can use:
Windows key + Print Screen
-
This will save a screenshot of your entire screen to the Pictures > Screenshots folder.
Alt + Print Screen
-
This will copy an image of just your currently active window to your clipboard.
Editing and Sharing Screenshots
Once captured, open your screenshots in an editing program like Paint or Photoshop. Edit them by cropping, adding text/arrows, blurring sensitive info, etc.
Save your edited screenshots as JPG, PNG, GIF, or other image formats.
Share your screenshots by:
-
Emailing the image file
-
Putting them in documents/presentations
-
Posting on forums, wikis, chat apps
-
Adding to readme files and tutorials
Conclusion
As we've covered, Windows gives you several options for taking customizable screenshots - Print Screen, Snipping Tool, and shortcuts. Use these to quickly capture screens, edit them with annotations and cropping, and share them via docs, emails, and chats. With practice, you'll be able to take professional-grade screenshots for any purpose. Remember the different tools and find the best method for your specific screenshot needs.
Explore more topics: